
Attractive dinner party Decor
Poorvi Pasari
November 20, 2018
0 Comments
Transform your table with seasonal and year-round centrepieces that are simply elegant and easy to make for any chic dinner party.


To know more:
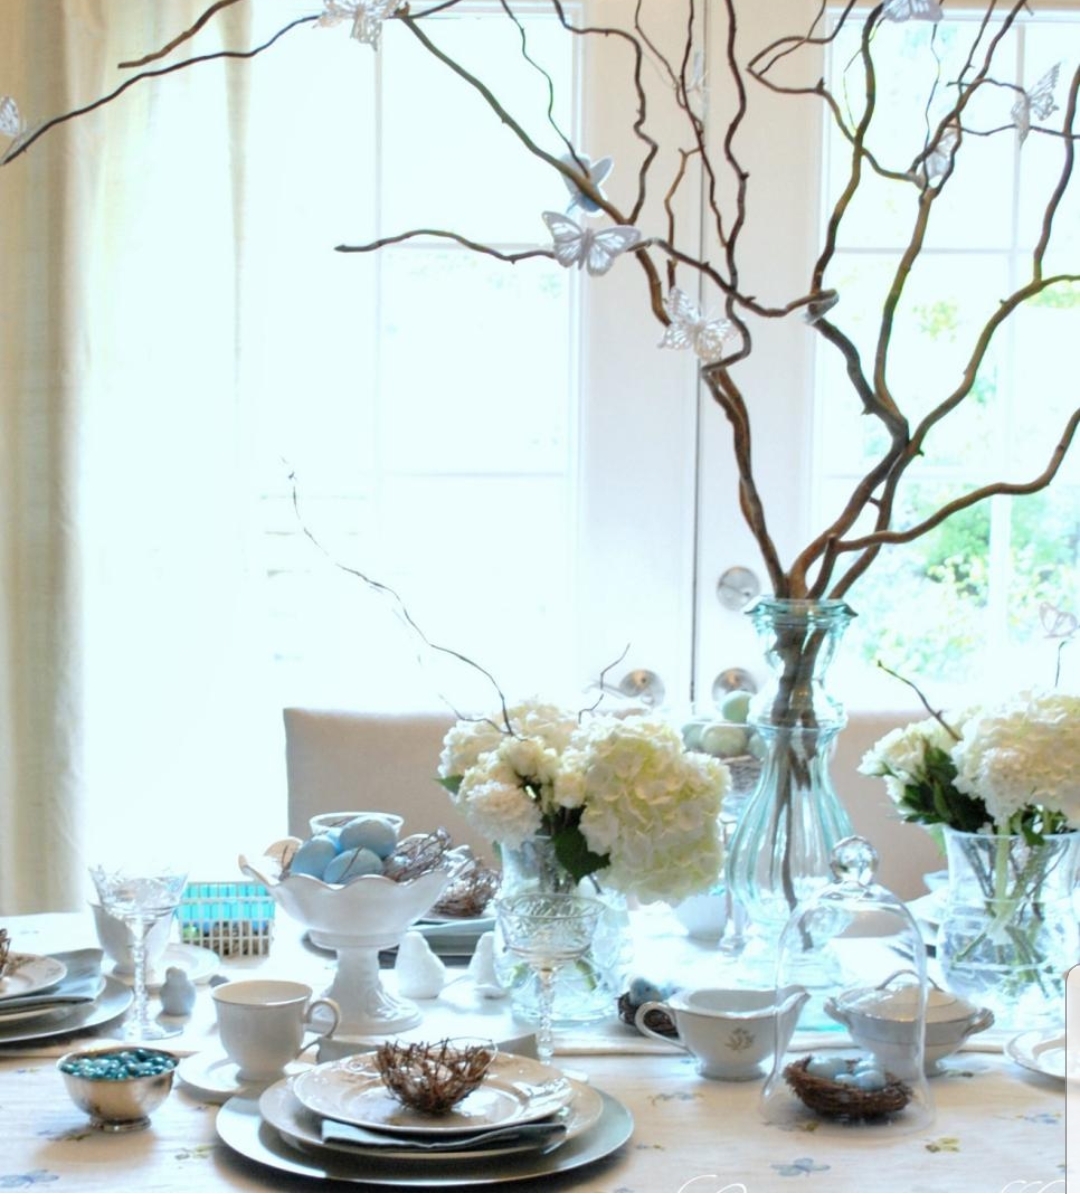
1.Spring Fling
This whimsical centrepiece is perfect for spring-inspired dinner parties and is surprisingly simple to create. Gathered several manzanita branches into a tall vase to bring the outdoors in. These gorgeous branches, with their twists and curls, make such a dramatic statement on a tabletop, You can even replace the butterflies with seasonal objects, like leaves or snowflakes, for a gorgeous centrepiece to celebrate any holiday or season.
2.Set the Table
The table should be a feast for the eyes with lots of interest to gently stir your guests with anticipation for delicious food. Pull out your finest serving pieces to up the feeling of elegance, and use a beautiful fabric as a tablecloth. For this party, a navy blue microsuede sets a rich and dramatic backdrop for the table.

3.No-Fuss Centrepiece
To create a pretty yet simple centrepiece, place square dinner plates down the center of the table. Arrange a mixture of mercury glass and milk-glass votive holders filled with flowers on each plate. For added sparkle, add a piece of vintage jewellery to each plate.

4.No-Fuss Centrepiece
Maranta foliage with curly willow tips and a sunset-orange garden rose are placed in five-inch round vases to create arrangements that take no time to put together. Place evenly along the length of the table and alternate with glass votives to make a dramatic centrepiece.

5.Haute Organic
This modern rustic look works just as well for a backyard party as it does for informal indoor meals. Pinecone dinner plates with a handmade burlap runner above a striped tablecloth create a cozy provincial look.

6.The New Traditionalist
Flax-coloured embroidery on a dusty aquamarine tablecloth, a sandy silk sequin runner and white plates set a luxurious tone for this table setting. Pale blue and sand-coloured cotton napkins keep the look grounded while the canary-yellow bread plates add a pop of colour.

7.Walk in the Park
This botanical print is perfect for summer and spring. By playing up the darker jewel tones and switching out the pastel colour, it also works well for winter and fall. Amethyst bubble tumblers play up the jewel tones in the tablecloth, while crimson tapers and fresh bloom terrariums complete the fresh garden look.

8.Delicate Drama
Footed cubes of various heights with simple cymbidium orchid blossoms bring delicate champagne accents to the palette.


